Delish Dinners (delishdinners) is now on Instagram. It will be much easier to update regularly.
Feel free to follow and share!
Here is a sneak peek of some of the upcoming recipes I’ll be sharing.
Delish Dinners is on Instagram!
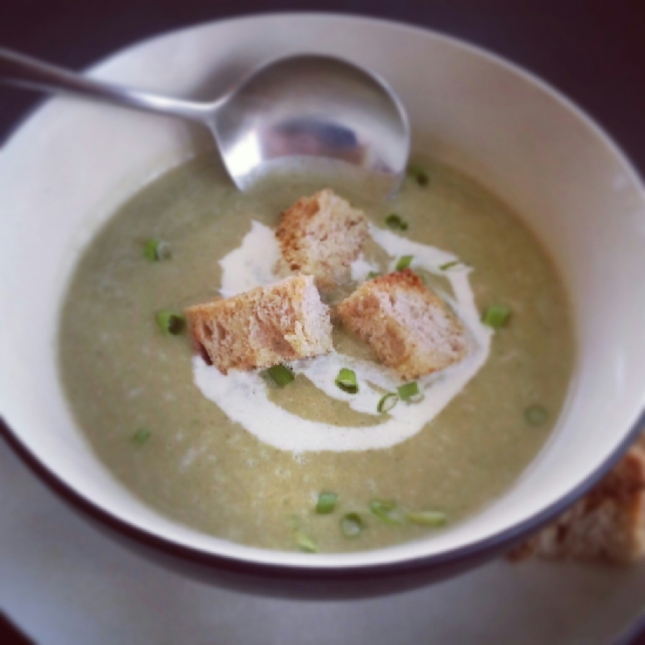
Broccoli, Leek & Potato Soup
I have abandoned this blog for such a long time that I almost feel like I have some nerve showing up again.
It’s hard to say why I slacked off. I want to blame my stressful job, moving house etc, but I’ve already used those excuses. The truth is I got lazy with the whole process. The whole transferring the photos from the camera to the laptop, editing, resizing, the uploading and the formatting. With the technology boom and introduction of photo sharing apps like Instagram, there are way easier ways to share photos and information with a few easy taps on the screen. I find myself rarely sitting in front of the laptop at home anymore.
I am contemplating starting an Instagram so that I can post more frequently instead of boring my Facebook friends with food photos and food related posts.
While I think about that, here is a yummy broccoli, leek and potato soup. It’s not the most pleasant smelling soup when it’s on the stove. In fact, if I recall correctly The Husband came into the house and asked if the dog had gas again. It is a lovely warming soup though and even better with some crunchy sourdough croutons.
INGREDIENTS
2 thick slices sourdough bread, cut into 1cm pieces
Olive oil spray
1 leek, pale section only, halved lengthways, thinly sliced
2 garlic cloves, crushed
1 large potato, peeled, finely chopped
1L (4 cups) water
1 chicken stock cube, crumbled
600g broccoli, cut into florets
1 cup baby spinach leaves
1/4 cup cream
METHOD
1. Make your croutons!! Preheat the oven to 180C. Place the bread on a baking tray and spray lightly with olive oil spray. Bake, turning once, for 10 minutes or until golden.
2. Start the soup! Heat a large saucepan over medium heat. Spray with olive oil spray. Cook leek, onion and garlic until onion is soft and translucent.
3. Add the potato, water and stock cube to the leek mixture. Bring to the boil. Reduce heat to low and simmer for 10 minutes. Add the broccoli. Simmer for 5 minutes or until the broccoli is tender. Add the spinach leaves just before turning off the heat. Set aside to cool slightly. Add cream.
4. Place the soup into a blender and blend until smooth. Alternatively you can use a stick blender to blend the soup. Transfer the soup to a clean saucepan. Stir over medium-low heat until heated through.
5. Serve with a drizzle of cream and sourdough croutons.
Chicken Souvlaki
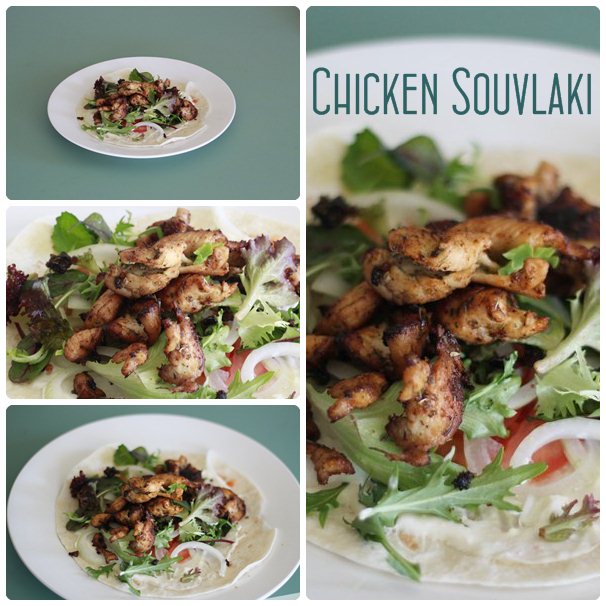 One of my friends is a souvlaki purist. She gets offended when souvlaki is made in any variation other than the ‘traditional way’. Me? I don’t mind so much. I like a bit of variety and experimentation but not so far as totally changing a dish.
I scoured the web for a good souvlaki recipe that didn’t veer off into strange ingredients and fancy methods. I just wanted grilled, tasty chicken wrapped in a pita with a punchy garlic sauce and this recipe was the one I decided to go with. The only thing I did differently was not skewer the chicken, ain’t nobody got time for that. I simply sliced the chicken breast into strips and cooked it on a cast iron grill. Yum! That was my favourite part, scraping all the gooey, caramelised chicken bits on the bottom of the pan….Happy days.
I also did not use kalamata olives or red onion because I didn’t have any on hand…and I’ve never had olives in a souvlaki and didn’t feel like I wanted to…
Ingredients
- For the Chicken:
- 5 tablespoons fresh lemon juice
- 4 tablespoons red wine vinegar
- 4 tablespoons olive oil
- 2 tablespoons chopped fresh oregano leaves
- 2 teaspoons kosher salt
- 1/2 teaspoon ground black pepper
- 2 pounds skinless boneless chicken breast, trimmed of excess fat and cut into 1-inch pieces
- 4 medium cloves garlic, grated (about 4 teaspoons)
- For the Tzatziki Sauce:
- 1 medium cucumber, peeled, seeded, cut into 1/4-inch cubes (see note above)
- 1/2 teaspoon salt
- 1 medium clove garlic, grated (about 1 teaspoon)
- 1 cup greek yogurt (see note above)
- 1 tablespoon chopped fresh dill
- For the Salad:
- 2 tablespoons olive oil
- 6 small tomatoes, cut into wedges
- 2 small red onions, sliced thin
- 1 medium cucumber, seeded and sliced into thin half moons
- 3/4 cups pitted kalamata olives
- 6 ounces crumbled feta
- 1/4 cup chopped parsley
- 6 pitas
Method
-
- In medium bowl, whisk lemon juice, vinegar, olive oil, oregano, salt, and black pepper. Place chicken cubes in a separate medium bowl. Mix in grated garlic and 7 tablespoons of dressing. Toss chicken to coat evenly, cover, and refrigerate to marinate for about 2 hours, tossing occasionally. Set remaining dressing aside for salad.
- While chicken marinates, make the tzatziki sauce: Place cubed cucumbers in strainer set over bowl. Toss with 1/2 teaspoon salt and let sit to drain, about 30 minutes. Gently pat cucumbers dry with paper towel, place in small bowl, and mix with garlic, yogurt, and dill. Season to taste with salt. Refrigerate until ready to serve.
- Skewer chicken pieces on 8 to 12 skewers. Discard used marinade. Heat grill or grill pan over medium-high heat. Place chicken skewers on grill (or cook in batches on grill pan) until well browned and internal temperature registers 155° on instant read thermometer, turning evenly to cook on all sides, about 5 minutes total. (Adjust temperature of grill if necessary). Remove chicken to a serving platter and let rest 3 minutes. Meanwhile, briefly grill pitas and keep warm.
- Just before serving, prepare the salad: Whisk olive oil into reserved chicken marinade. Add tomatoes, onions, cucumber, olives, feta, and parsley. Season with salt and pepper.
- Serve skewers with salad, pita, and tzatziki sauce. Remove chicken from skewers to stuff into pitas with sauce and salad.
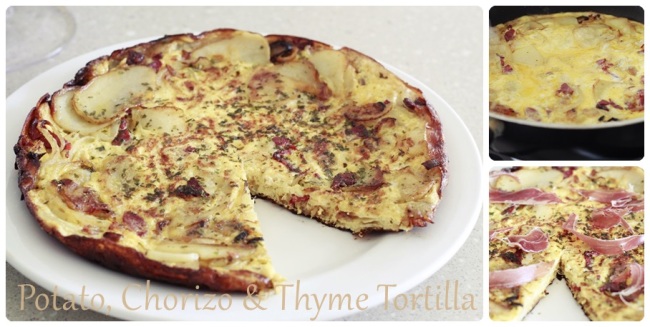
Potato, Chorizo & Thyme Tortilla
This tortilla/fritatta is a brunch favourite in our house. I call it the Happy Marriage Tortilla because it represents a happy medium for my husband and I. There’s meat and potatoes, 2 points to the caveman corner. Then theres’s frilly girly things like beaten eggs and beautifully fragrant thyme, some delicately sautéed onion….2 points to the women’s corner. Told you, happy medium!
Together, this tortilla packs a flavourful punch. To quote my friend, “It’s like a party in my mouth and everyone is invited”. With every bite, you get a little surprise – some meaty, rich and spicy chorizo…delicately seasoned egg…. POP -there’s some thyme and that subtle sweetness? Oh that’s just the onion. Crispy and decadent, the potatoes are my favourite part and if you really want to go KABOOM POW, layer some slices of prosciutto on top before serving with some dressed greens for a delish lunch or dinner.
Ingredients
8 large eggs
4 medium sized yellow-fleshed potatoes, sliced as thin as you can go!
3 tbsp chopped thyme (fresh is preferable)
1 large chorizo sliced thinly
1 onion, diced
1 clove of garlic,minced – optional
4-6 slices of pancetta or prosciutto, torn into smaller strips
1/4 cup freshly grated Parmesan cheese
1/4 cup milk
2tbsp Olive oil
Salt and pepper, to taste
Method
- Heat the olive oil in a large frying pan over low-medium heat. Cook the potatoes, chorizo, onion and garlic, stirring frequently. Season with salt and pepper.
- Spread the potato, onion and chorizo mixture evenly over the bottom of the frying pan and turn the heat down.
- In a separate bowl, whisk the eggs, thyme, Parmesan cheese and milk until well combined. Pour the egg mixture over the potatoes and chorizo, shaking the pan to ensure it is evenly distributed.
- Cook, with a lid on for about 8-10 minutes, keeping an eye on the bottom of the pan. Because I cooked it with the lid on, the heat was trapped and the top started to set, making it easier and more sturdy to flip.
- Here’s the fun part. Once the bottom of the tortilla is golden and cooked, you can either put the pan in the oven to finish the top (if you have a metal handle on your frying pan) OR, you can cover the top of the frying pan with a large plate and while holding the bottom of the plate, turn the pan and tortilla onto the plate. Then, gently shimmy and slide it back into the pan to cook the underside. From the time you flip, you only need a further 3-4 minutes of cooking time to set that egg.
- When you’re ready to serve it, top it with the prosciutto slices and some rocket leaves, if desired.
- Serve with lightly dressed rocket leaves and crusty bread or as part of a delish big breakfast with bacon, tomatoes, mushrooms and spinach.
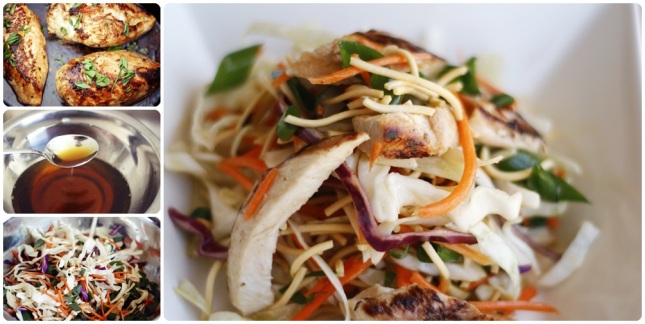
Crunchy Chicken Noodle Salad
I love this salad and would eat it every day if I could. It’s fresh, it’s light but satisfying, it’s packed with flavour and best of all, it stores well so you can easily prep it the night before and take it to work the next day.
As always, I freestyle the recipe amounts, so I will give approximates…I’m sure you can figure it out for what suits you and your current situation. For myself, I always cook for myself and my husband and hope for leftovers the next day for our work lunches.
Now, if you’re lazy time-poor like me, you can just opt for a pre-sliced bag of coleslaw mix from the supermarket instead of chopping all of your cabbages and grating carrots and ruining your manicure. You just march yourself into that refrigerated aisle and buy yourself a bag of coleslaw mix like it ain’t nobody else’s business and don’t feel bad about it. These small conveniences can save you heaps of time and effort in the kitchen and it’s not going to cause brain cancer, starve a third world country or kill of baby gorillas.
Ingredients
3 chicken breasts
1 bag Coleslaw mix
1/4 cup spring onions, sliced
1/3 cup toasted peanuts
1/2 cup Chang’s Fried Noodles
1/2 cup soy sauce
4 tbsp fish sauce
1 lime, juiced
Drizzle of sesame oil
1/4 cup rice wine vinegar
Method
- Marinate whole chicken breasts in 3/4 of the soy sauce, 2 tbsp of fish sauce, lime juice and a lick of sesame oil. Marinate for a least an hour, covered with cling film, however overnight is even better.
- Cook the chicken breasts on a cast iron grill or heavy based pan. A barbecue would be even better for that smoky charred flavour. Once the chicken is cooked through, set is aside to cool before slicing or shredding it.
- In a separate large bowl, empty out your coleslaw bag (if you’re making it from scratch, put your carrots, cabbage and spring onion in now). I can’t believe I just made opening a bag of coleslaw an actual step in this recipe.
- Make the dressing by combining the remaining soy sauce, 2 tbsp fish sauce, a little drizzle of sesame oil and rice wine vinegar. Taste as you and make any adjustments to suit your taste. Disclaimer: I am a salt fiend and really go ape with the soy – you may want to go easy to on the suggested amounts and taste as you go to suit your own palate.
- Toss the sliced/shredded chicken with the salad and pour the dressing over. If you eating or serving the salad later, stop here. Do not pass GO and do not collect $200. If you add the nuts and fried noodles now, they’ll take up that dressing and lose their crunch factor, so if you’re eating this later, simply store the salad in a sealed container or covered with cling film and add the nuts and noodles just before serving. If you’re taking this to work, just pack these items separately.
- Toast your peanuts in a dry hot pan with NO oil over a medium heat until thy’re toasty and fragrant. Some slight char marks are ok, but if you walk away to go and watch Chelsea Lately and get lost in her horse-like features and un-witty banter, you may come back to some smoking black little nuts. I meant the peanuts, not the guests on her show, just so we are clear
- Last but not least, when it’s time to serve, toss the toasted peanuts through the salad, top with some crunchy noodles and garnish with some coriander (the herb of the devil, I hate it) or sliced chilli and spring onion. .
FYI, I am sorry in advance for any formatting or spelling issues on this post. My little Malshi has insisted on laying on my lap between myself and laptop. Her paw keeps jerking as she dreams and is hitting random keys. I think I found most of the mistakes and corrected them, but any that slipped through are solely her fault. That’s my story and I’m sticking with it. Lucky she is cute.
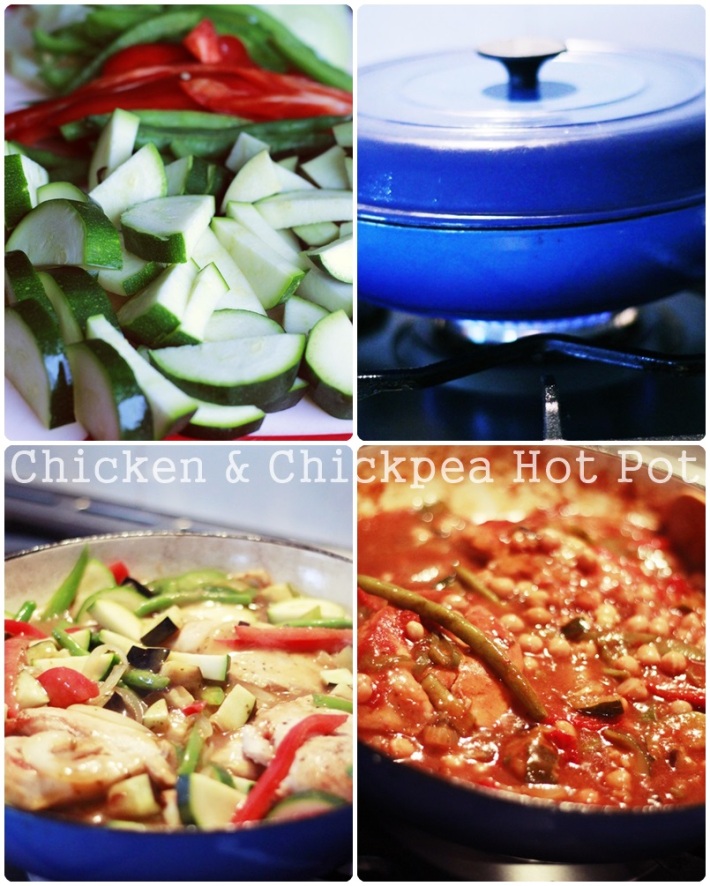
Chicken & Chickpea Hot Pot
Forgive the photos, this was a quick mid-week dinner after a rough day at work. What it lacks in presentation, it makes up for in taste! I loosely based the meal on this recipe, but added extra vegetables like green beans, red and green capsicums and lots of zucchini to fill it out with more veggies.
Ingredients
- 2 tbsp vegetable oil
- 500g/1lb 2oz chicken thighs
- 1 onion, sliced
- 1 garlic clove, sliced
- 2 carrots, chopped
- 1 celery stalk, chopped
- 1 red chilli, deseeded and chopped
- splash red wine
- 275g/9½oz chorizo, chopped
- 100ml/3½fl oz dry sherry
- 1 x 400g/14oz can chopped tomatoes
- 200ml/7fl oz chicken stock
- 1 x 400g/14oz can chickpeas, rinsed and drained
- salt and freshly ground black pepper
- handful chopped fresh parsley
- crusty bread, to serve
Method
- Heat half of the vegetable oil in a large pan. Add the chicken thighs and fry, turning frequently, until lightly browned all over. Remove from the pan and keep warm.
- Add a little more oil to the pan, then add the onion, garlic, carrots, celery and chilli and cook for five minutes. Add a splash of red wine and simmer until reduced by half.
- In another pan, heat the remaining oil and fry the chorizo for 2-3 minutes. Add the sherry and cook until the chorizo is crisp. Set aside.
- Add the can of chopped tomatoes to the pan with the vegetables and bring to the boil. Cook for five minutes, then add the stock and bring back to the boil.
- Add the browned chicken, the chickpeas and crisp chorizo and simmer for 20-25 minutes, or until the chicken is completely cooked through. Season, to taste, with salt and freshly ground black pepper.
- Sprinkle with chopped parsley and serve with crusty bread.
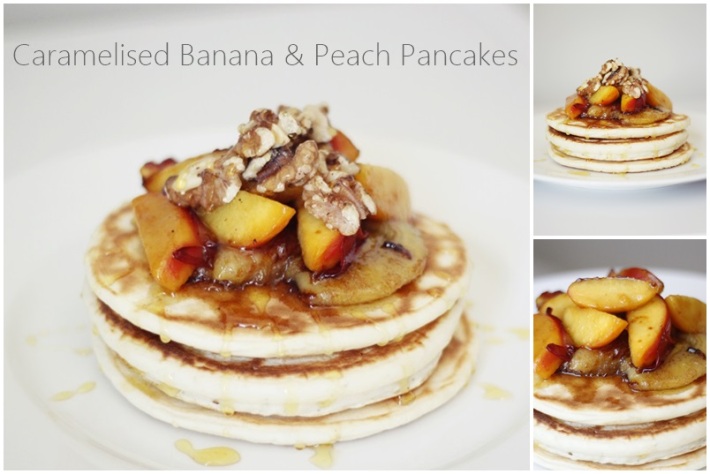
Caramelised Banana & Peach Pancakes
Sugar, butter, a dash of vanilla extract, maybe a little cream?
It’s hard to imagine any fruit on this earth not tasting amazing after being gently cooked until tender and lusciously sweet, glistening in a caramelised glaze.
I chose banana and peach because I was feeling all summery sashaying about the kitchen in my floral summery dress, but almost any fruit, especially stone fruits would go well with this style of dish. Think stewed, cinnamon and clove-scented apples or orange segments (add some brandy if you’re feeling particularly fancy)… Or maybe even nectaries, pineapple or pear?
Sweet fruit, fluffy pancakes, topped with some crunchy walnuts, this recipe is sweet and indulgent.
So if you’re feeling like a particularly naughty start to the weekend or feel like indulging in a sweet dessert after a hard day, but don’t want to feel completely guilty (hey, it has fruit in it, okay!!!), read on.
This recipe serves 2 hungry beasts.
Ingredients
Basic Pancake Mix:
- 300g (2 cups) self-raising flour
- Pinch of salt
- 500ml (2 cups) milk
- 2 eggs
- 60g butter, melted
- 1 tsp vanilla extract (optional)
For the fruit:
- 1 peach, cut into wedges (leave the skin on)
- 1 banana, peeled and halved
- 2 tbsp butter (you’re supposed to use unsalted, but I like using salted butter)
- 2 tbsp brown sugar
- 1 tsp vanilla extract
- A dash of cream, if you so desire (this makes a more smooth, velvety caramel)
- 1/2 cup toasted walnuts, pecans or slivered almonds
- Ice-cream or double cream, to serve
Method
- Make the pancakes first. Combine flour, salt, milk, eggs, butter and vanilla extract (if you are using it). Whisk until well combined.
- Get your non-stick frying pan started over a low-medium heat. I don’t grease the pan prior to cooking my pancakes, but feel free to if that’s your thing.
- Using a soup ladle or some other kind of scoop or measuring cup to ensure consistency (unlike me, who freestyled it and it shows), pour the pancake batter into the pan. When it begins to bubble on top, flip them over gently. Once both sides are golden brown, remove them and set them aside to keep warm while you continue on making more pancakes.
- If you’re really good at multitasking, start with the fruit. It doesn’t take very long to cook and can burn really easily so it needs your undivided attention. Over low heat, melt the butter in a non-stick, deep frying pan. Add the sugar and vanilla extract and wait for it to develop a slightly richer, darker colour. Add your peaches and banana and fry for about 2-5 minutes per side, until glossy and the caramel mixture has thickened a little.
- If you want to add cream for a more velvety caramel, remove the fruit and then whisk in your cream after turning the pan off.
- Stack your pancakes (about 2-3 per serve) and top with caramelised fruit. Drizzle remaining caramel over the fruit and pancakes. Top with toasted nuts. Serve with a dollop of ice-cream or double cream.
- Start your diet tomorrow.
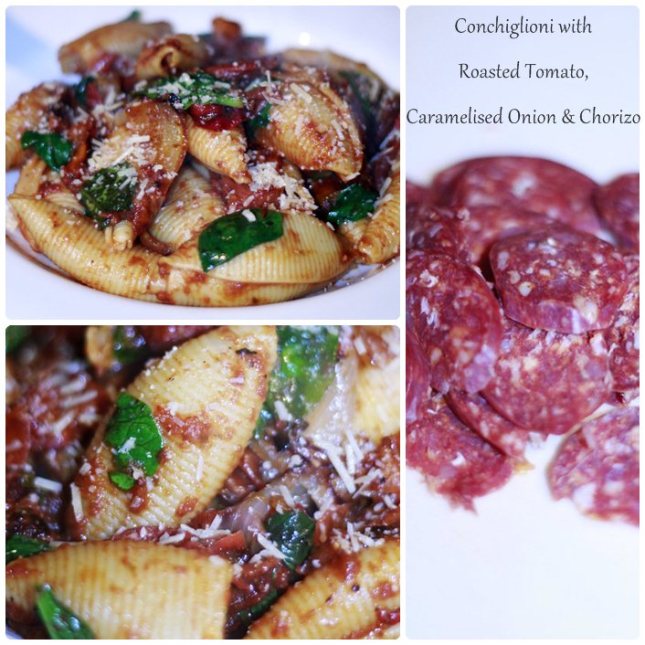
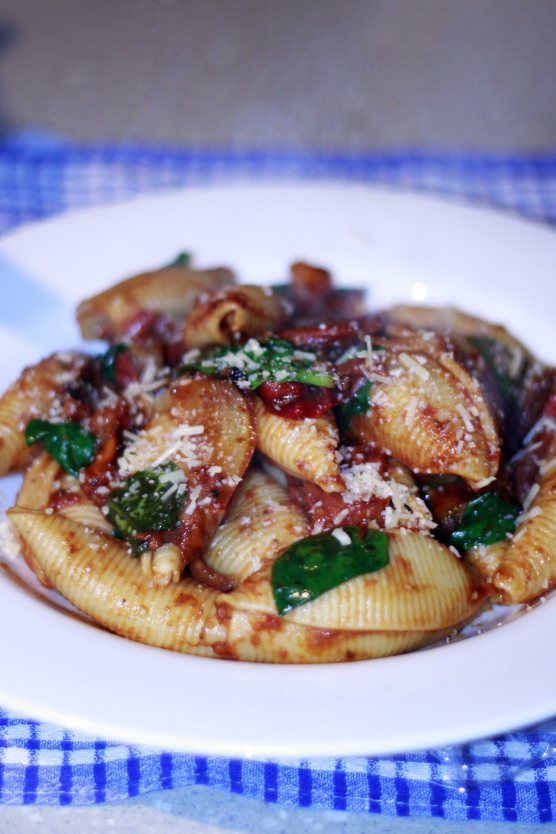
Conchiglioni with Roasted Tomato, Caramelised Onion & Chorizo
When I saw these conch-shaped pasta shells in the supermarket, I actually stopped in the middle of the aisle, eyes wide like saucers, oblivious to the muttering woman behind me who had almost run her trolley up my rear end.
As I stood in the aisle mesmerised by all the things I could picture myself doing with this pasta, I realised I hadn’t had these for the longest time- and certainly had never cooked them myself. I had enjoyed them at my grandma’s house, dripping in home-made tomato sauce or baked under a lovely sprinkle of mozzarella crust as pasta al forno.
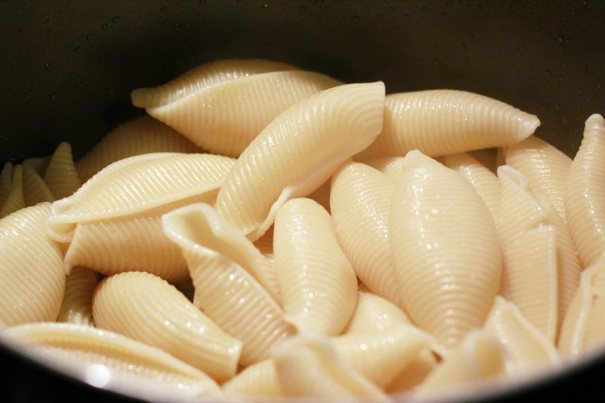
This large, shell shaped pasta is perfect for soaking up delicious sauces or being stuffed with tasty ricotta based fillings. Think of it as a shell shaped cannelloni. Even though before they are cooked the shells have a wide, deep scoop, when cooked, they curl up on themselves, nestling all the flavours in their shell. It’s like a big pasta hug.
I chose to do a slow-roasted tomato, caramelised onion and chorizo accompaniment for this pasta because I knew it would soak up those flavours perfectly. Of course you could have this sauce with your penne or fettuccine as well.
This is an easy after work dinner- simply pop the sauce ingredients on a baking tray for about 40 minutes while you catch up on housework or unwind from the day- then just cook the pasta and toss it all together.
Ingredients
- 1 packet of conchiglioni pasta
- 3-4 tbsp olive oil
- 4 large tomatoes, cut into wedges
- 3 mushrooms, whole
- 1 onion, quartered
- 3 garlic cloves, unpeeled
- 1 red capsicum, sliced thinly
- 1 cup baby spinach leaves
- 2 tbsp tomato puree
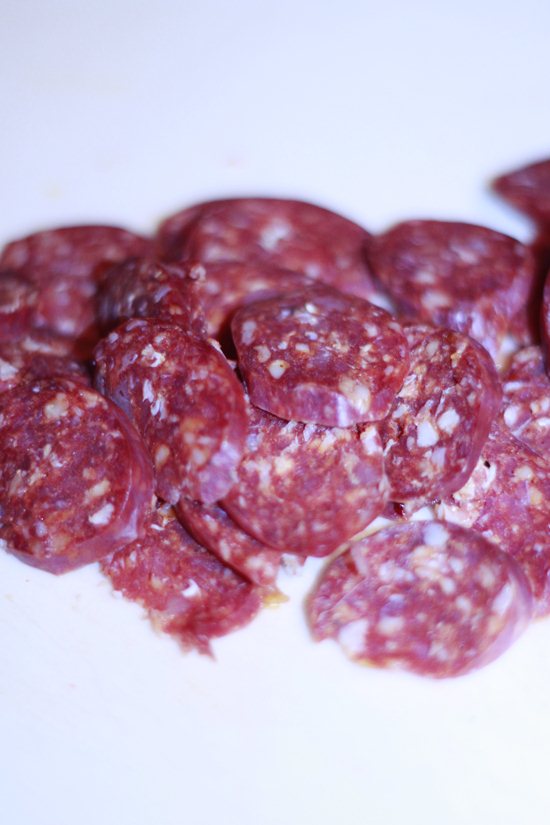
- 1 chorizo sausage, sliced thinly
- 1/4 cup Basil leaves, roughly chopped (or dried basil)
- Salt & Pepper
- 1/4 Parmesan cheese
Method
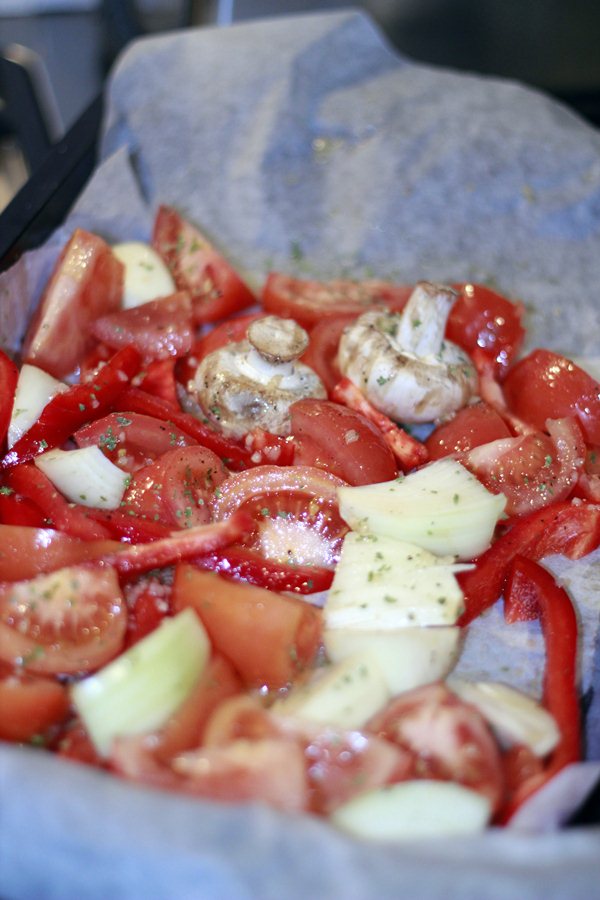
- Preheat oven to 170°C (fan forced). Arrange tomatoes, onion, garlic, mushrooms and capsicum on a baking tray lined with baking paper. Drizzle with 1-2 tablespoons of olive oil, season with salt and pepper and cook in the oven for about 40 minutes to an hour.You want the tomatoes to be soft, slightly browned and collapsing. Don’t fret if there’s a bit of colour on your onions or capsicum- it adds to the flavour, but if your onions have burnt, peel off the outer few layers.
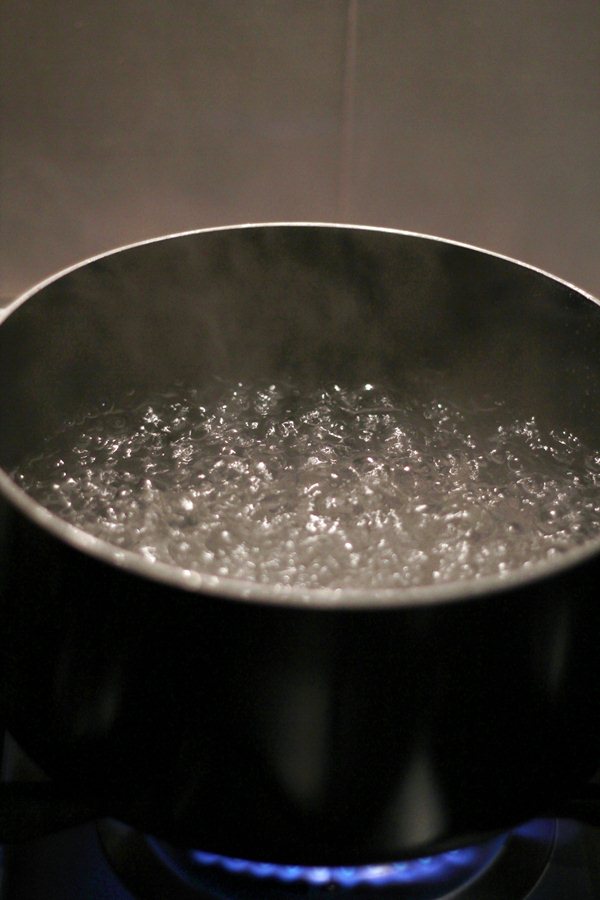
- Meanwhile, cook pasta in boiling water with a generous amount of salt and olive oil to prevent the pasta sticking together. When cooked, drain (retain 3/4 cup of the pasta water in a separate cup or bowl for later) and set aside in the same saucepan, covering it with a lid.
 Once the tomato mix has cooled somewhat, cut the tip off the garlic cloves and squeeze out the roasted garlic. With a wooden spoon, squash the tomatoes down- it’s not about perfection, it’s going to look ‘rustic’ (translation: sloppy)- don’t stress about it! Slice the mushrooms thinly.
- Heat a large frying pan over medium heat, add 1 tbsp olive oil and the sliced chorizo and cook for a few minutes until it has picked up some colour. Add the tomato mix to the pan with the tomato puree and pasta water, stir it around until the sauce begins to thicken and emulsify.
- Add the pasta to the pan, toss through the sauce and add your spinach and basil leaves until they wilt. Season to taste.
- Serve with Parmesan and some crusty bread.
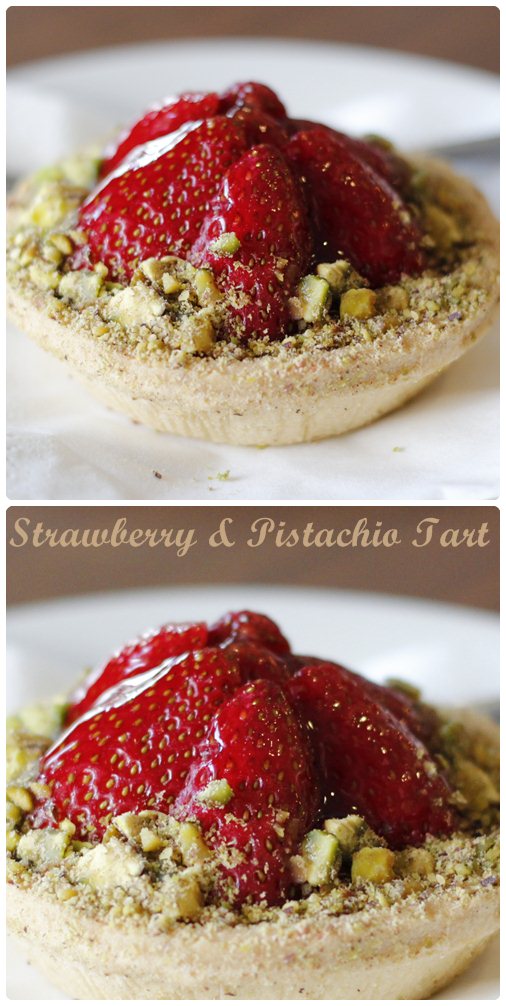
Strawberry & Pistachio Tarts
I hate making pastry. If I can get it from the frozen food section at the supermarket, why would I bother with the mixing, kneading, rolling, blah, blah, blah, right?
But sometimes, you just NEED to make pastry from scratch otherwise the recipe just isn’t the same. This is one of those recipes.
If you are lazy pressed for time, then I’m sure this delectable tart will be pleasantly acceptable with some pre-made frozen shortcrust pastry. But if you want a va-va-voom, toe-curling, eye-rolling explosion in your mouth, make it from scratch. I promise I will never force you to do it again.
I used Ina Garten’s recipe. Ina’s recipe calls for pretty, shelled and halved pistachios. I pounded the crap out of mine in a bag with a rolling pin for a little more texture. Between the sweet berries, crumbly buttery pastry and crunch of the pistachios, this is a great recipe for when you want to impress and worth the extra effort.
Ingredients
- 1 1/4 cups all-purpose flour
- 3 tablespoons sugar
- 1/2 teaspoon kosher salt
- 6 tablespoons (3/4 stick) cold unsalted butter, diced
- 2 tablespoons cold shortening (recommended: Crisco)
- 1/4 cup ice water
- 2 cups Pastry Cream, recipe follows
- 2 pints whole strawberries, hulled and halved
- 1/3 cup apricot jelly
- 3 tablespoons shelled pistachios, halved, optional
Method
- Combine the flour, sugar, and salt in a small bowl and place in the freezer for 30 minutes. Put the flour mixture in the bowl of a food processor fitted with a steel blade. Add the butter and shortening and pulse about 10 times, or until the butter is in the size of peas. Add the ice water and process until the dough comes together. Dump on a well-floured board and form into a disk. Wrap in plastic and chill for at least 30 minutes.
- Meanwhile, preheat the oven to 375 degrees F.
- Roll out the dough and fit into 4 (4 1/2-inch) tart pans with removable sides. Don’t stretch the dough when placing it in the pans or it will shrink during baking. Cut off the excess by rolling the pin across the top of each pan. Line the tart shells with a piece of buttered aluminum foil, butter side down, and fill them with dried beans or rice. Bake for 10 minutes. Remove the beans and foil, prick the bottom of the shells all over with a fork, and bake for another 15 to 20 minutes until lightly browned. Set aside to cool.
- Before serving, fill the tart shells with the pastry cream. Arrange the berries decoratively on top of the cream. Melt the apricot jelly with 1 teaspoon of water and brush the top of the tarts. Sprinkle with pistachios, if using, and serve.
Pastry Cream:
- 5 extra-large egg yolks, room temperature
- 3/4 cup sugar
- 3 tablespoons cornstarch
- 1 1/2 cups scalded milk
- 1/2 teaspoon pure vanilla extract
- 1 teaspoon Cognac
- 1 tablespoon unsalted butter
- 1 tablespoon heavy cream
- In the bowl of an electric mixer fitted with the paddle attachment, beat the egg yolks and sugar on medium-high speed for 4 minutes, or until very thick. Reduce to low speed, and add the cornstarch.
- With the mixer still on low, slowly pour the hot milk into the egg mixture. Pour the mixture into a medium saucepan and cook over low heat, stirring constantly with a wooden spoon, until the mixture thickens, 5 to 7 minutes. Don’t be alarmed when the custard comes to a boil and appears to curdle; switch to a whisk and beat vigorously. Cook, whisking constantly, for another 2 minutes; the custard will come together and become very thick, like pudding. Stir in the vanilla, Cognac, butter, and heavy cream. Pour the custard through a sieve into a bowl. Place plastic wrap directly on the custard and refrigerate until cold.
Slow Cooked Steak & Bean Tacos
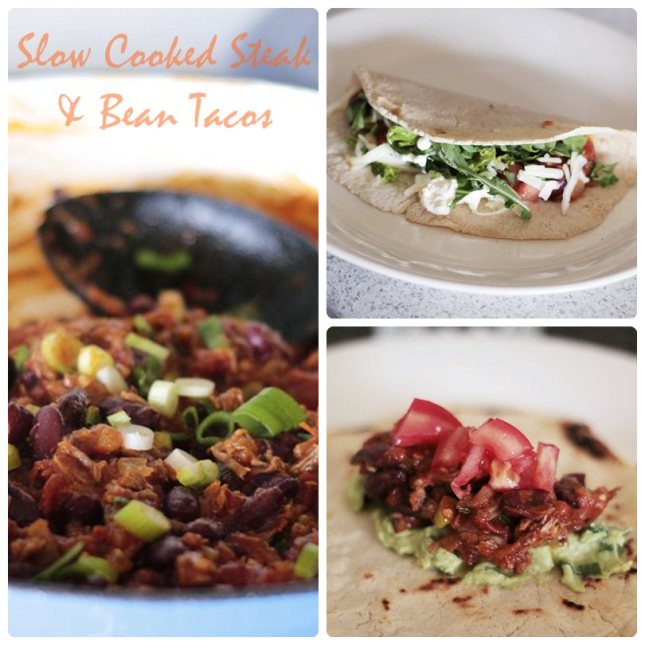 Today’s recipe is going to be a big cluster of photos because I felt like doing a step by step post today. If you’re on a slow internet connection or a download limit….my bad.
I haven’t decided if I like this format or not, but sometimes a visual does make explaining things a little easier.
I love Mexican food, love the flavours of beans, mouth watering shredded meats, tart lime juice, corn, avocado- yum, I drool just thinking about it.
I’m not trying to pretend to be some super awesome authentic Mexican cook, because I’m not. Let’s be real, for the first 18 years of my life, any Mexican food I ate was made from an Old El Paso burrito kit or in a food court, made by a pimple-faced teenager who couldn’t even pronounce jalapeno.
This is how we make it in my house and this is how we like it. Authentic or not, the flavours are good and everything tastes that much better when you make it yourself. You know what’s in it and you appreciate it more when you know what you went through to make it.
You can substitute chicken for the beef in this recipe and it’s just as delish.
My favourite part of this recipe though is the handmade soft corn tortillas. The meal looks a little more ‘rustic’ (my tortilla making technique isn’t the best without a tortilla press), but the taste is worth it!
With the guacamole, I believe the traditional recipe calls for chopped coriander. I personally hate coriander so have avoided it in this recipe.
As usual, my measurements are approximate. I go by taste and feel most times, but I’ve done my best to be accurate. We had leftovers for lunch.
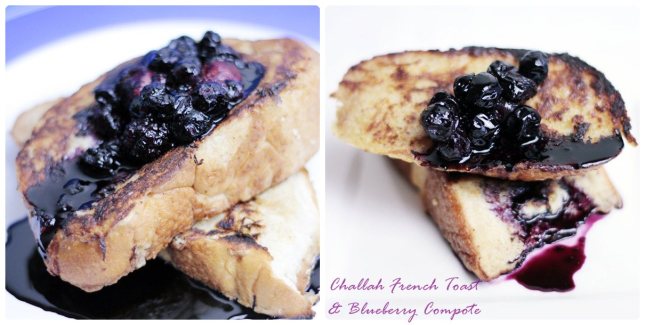
Challah French Toast with Blueberry Compote
Lazy weekend breakfasts are my thing.
It took me a while, but I’ve learned to love breakfast. It should be special and I think that people don’t celebrate it enough anymore. It should be the highlight of the weekend, a time to congregate around the table with your loved ones, reflect on the week and unwind while enjoying scrumptious food.
Our Saturday morning breakfast was messy, runny and ever so delish. The Challah was the perfect bread for these thick slices of French Toast- soft yet absorbent, it mopped the cinnamon-scented egg and milk mixture right up and even after the frying process, it was beautiful and soft and melt-in-your-mouth.
INGREDIENTS
For the French Toast:
- 3 large eggs
- 1 cup whole milk
- 1 tsp sugar
- 1/4 tsp salt
- 1 tsp cinnamon
- 1 Challah or Brioche loaf, cut into 6-8 thick slices
- 3 1/2 tbsp unsalted butter
For the blueberry compote:
- 2 cups frozen blueberries
- 3 tbsp water
- 1/4 cup sugar
- 2 tsp lemon juice
METHOD
- First, get your blueberry compote started. Combine 1 cup of the blueberries, water, sugar and lemon juice in a small saucepan.
- Cook over a medium heat for about 10 minutes.
- Add the rest of the blueberries and cook for 8 minutes more, stirring frequently. Cover and keep warm until you’re ready to serve it over the French Toast.
- Meanwhile, whisk together eggs, milk, sugar, cinnamon and salt in a large, shallow bowl.
- Dip each slice of bread into the mixture, ensuring that both sides have soaked up the liquid.
- Heat a large frying pan on medium heat and melt a tablespoon of butter.
- Cook the bread in batches until both sides are golden. Transfer them to a baking dish and keep warm in the oven while you cook the remaining slices.
- Serve the French Toast with a few spoonfuls of the warm blueberry compote. If you’re feeling extra naughty, a scoop of ice-cream or whipped cream and maple syrup would be perfect too.
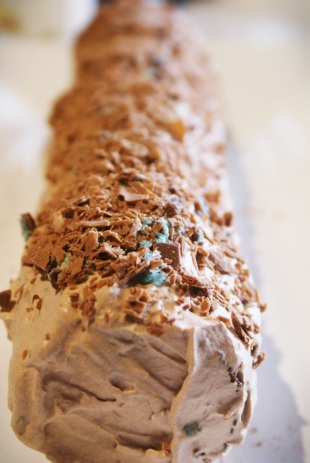
Chocolate Peppermint Log
 This was an old post originally published in August 2010, however I have had a few friends ask me about it so I thought I’d edit the post, put some new more recent pictures with it….and promise to start my diet tomorrow.
The original post continues below.
————————————————————————————————————————————————————–
When I go out to eat, I always, without hesitation, order the fanciest, most overdone, pretentious, bordering on ridiculous dessert I can find on the menu.
A part of me takes joy in the destruction of such works of delectable art. It’s a power trip of epic proportions. I break the desserts apart, burrow through them with my spoon like I’m digging for long lost treasure and smoosh everything together on the spoon while trying to get a bit of every single flavour into my mouth at once (always attempted in a lady like fashion, of course). That is part of the fun of eating out.
So when I’m home it’s quite the opposite. I don’t have the time, energy or patience for intricate desserts. Rough and dirty baby, that’s how I like ’em. Unlike the awful things I do to the pretty restaurant desserts, mine look ravaged prior to being served up. Cue recipe for the Chocolate Peppermint Log.
I like to think of this one as an Aussie Christmas tradition- someone will undoubtedly bring one to every Christmas lunch. Now, we can turn our noses up at the chocolate biscuit and whipped cream creation and act like we’re way above it all, but deep down, we’d all happily sit down and demolish a slice of this log without hesitation. I’ll keep your secret if you keep mine.
The chocolate peppermint log may not be ostentatious, it may not take half an hour to plate up or present as delicately and intricately as some of the other desserts out there, but it’s flavourful, quick, easy and the kids love to help make it. See, that’s what I’m all about. Bringing the family together. For sugary, chocolately, fat-laden treats. That’s me. I’m going to be a great mother one day….
Ingredients
- 1 packet of Chocolate Ripple biscuits (plain chocolate biscuits can also be used)
- 450ml thickened cream
- 1/4 cup cocoa
- 2 tbsp caster sugar
- 1 Peppermint Crisp chocolate bar, finely chopped or grated
- 1 Cadbury Flake chocolate bar, finely chopped (I also use Peppermint Aero instead of Flake)
- Combine cream, caster sugar and cocoa in a large bowl. Mix with electric beaters on med-high setting until peaks form and cream is whipped enough to spread with a knife. Add half of the chopped/grated Peppermint Crisp chocolate.
- Take a chocolate biscuit and spread thickly with whipped cream. Repeat with a second biscuit. “Glue” the biscuits together and repeat the process, spreading whipped cream on one side of each biscuit and gluing together to form a log shape.
- Once you’ve formed the log, take the remaining whipped cream and smother all over the log, covering it generously. You dont want to see any of the biscuits peeking out. Make sure you smooth the cream down the sides and all the way to the bottom.
- Sprinkle remaining Peppermint Crisp chocolate down the middle of the log and top with Flake chocolate. Refrigerate for 6 hours.
- To serve, slice the cake on a diagonal angle so you can see all the lovely layers of chocolate and cream.
Banana & Pineapple Pancakes
 Pancakes are a weekend ritual in our house and now that summer has arrived, I found myself becoming uninterested in pancakes and wanting fruity, tropical flavours for breakfast. This may have also had something to do with the remaining bottle of pineapple juice in my fridge and the bananas in the fruit bowl begging for mercy.
These pancakes were a nice change and perfect for a warm, sunny summer brunch. Next time, I’ll do just pineapple and coconut. It will be like a pina colada pancake! Ok. I’ll stop.
You can put the pineapple chunks or ring into the batter if you like, but I couldn’t be bothered. Maybe next time!
INGREDIENTS
- 225g (1 1/2 cups) self-raising flour
- 1 tsp baking powder
- 1 overripe banana, mashed
- 35g (1/3 cup) desiccated coconut
- 2 tbs caster sugar
- 1/2 cup pineapple juice
- 1/2 cup milk
- 40g butter, melted, cooled slightly
- 1 tsp vanilla essence
- 2 eggs
- extra butter, for greasing
- Vanilla ice-cream, to serve
- Maple syrup, to serve
METHOD
- Sift the flour and baking powder into a large bowl. Stir in the coconut and sugar. Make a well in the centre.
- Whisk together the pineapple juice, milk, butter, vanilla and eggs in a bowl. Pour the milk mixture into the flour mixture. Whisk until just combined, don’t over-mix or they’ll be too tough and chewy.
- Heat a large non-stick frying pan over medium-low heat. Grease the pan with a generous amount of butter.
- Ladle about 1/4 cup of batter into the pan and spread to form a 12cm-diameter pancake. Cook for 2-3 minutes each side or until golden and cooked through. Transfer to a plate and cover to keep warm.
- Repeat with the remaining batter, greasing with butter between pancakes. You should get about 8 pancakes from this recipe.
- Top with ice-cream and drizzle over maple syrup.
Recipe adapted from Taste.com.au
Brandy Snaps with Orange & Ricotta Cream
I’ve always wanted to make brandy snaps. For years, they’ve been a Christmastime treat, but they always struck me as too difficult, too fiddly, too poncy to make.
So this year I decided I am going to make them myself for next Christmas, but knowing me, I’d need a bit of practice because they just seemed too hard, so I propped myself on the couch and watched an hour of Youtube videos on how to shape them. That’s an hour of my life I’ll never get back, but it gave me some confidence to try it!
Mine are not perfect by any stretch of the imagination, some were deformed and I struggled a little with consistency, so next time I’ll try to perfect those things, but overall, it wasn’t as bad as I thought it was going to be! I recommend you giving it a try if you’ve been reluctant like I was. It totally opened up a new door to me once I did it and I got excited thinking about all the possible future recipes I could create after learning such a simple technique.
For a spin on the traditional whipped cream filling, I chose an orange and ricotta cream- orange and brandy seem to go well together and I chose to halve the whipped cream intake by adding ricotta… I’m not sure if a dietician would approve, but it sounded good in my head. And tasted even better on my lips! MM MMM!
INGREDIENTS
For the brandy snaps:
- 1 stick of salted butter (about 1/2 cup)
- 1/2 cup brown sugar
- 1/3 cup golden syrup (or molasses)
- 1 cup plain flour
- 1 tbsp brandy or cognac
For the filling:
- 1/3 cup butter
- 1/2 cup ricotta cheese
- 1/2 cup whipping cream
- 1/4 cup caster sugar
- 2 tsp orange zest
- 1 tbsp orange juice or Cointreau
METHOD
- Preheat oven to 160°C.
- To start on the brandy snaps, place butter, sugar, syrup and brandy in a medium saucepan over low heat; cook and stir until butter is melted. Stir in flour slowly and mix until it’s smooth.
- To ensure consistency, use a measuring spoon for 1 tbsp of batter. Drop the batter about 3-4 inches apart on a lined tray. Bake for about 10-12 minutes or until golden brown.Keep an eye on the oven because everyone’s oven is different and these can go wrong so fast…I should know!
- Remove from the oven and allow to cool enough to touch- about a minute or so. Gently peel the ‘biscuit’ from the tray and quickly wrap it around something with a tubular shape- a fat wooden spoon or cooking utensil, etc. If they get hard and uncooperative, pop them back in the oven for about 10 seconds and they’ll be pliable again.
- Allow the biscuit to cool around the mould and then gently remove and set aside.
- While the biscuits are cooling, start on the filling. Beat together butter, ricotta, cream, caster sugar, orange zest and orange juice/Cointreau until it’s smooth and glossy and beautiful. You want the cream to be light and fluffy.
- Get your piping bag ready! Pipe the filling into cooled brandy snaps just before you’re ready to serve them.
- Sit back and enjoy praise from husband while telling him how difficult they are to make and hinting you need a foot massage.
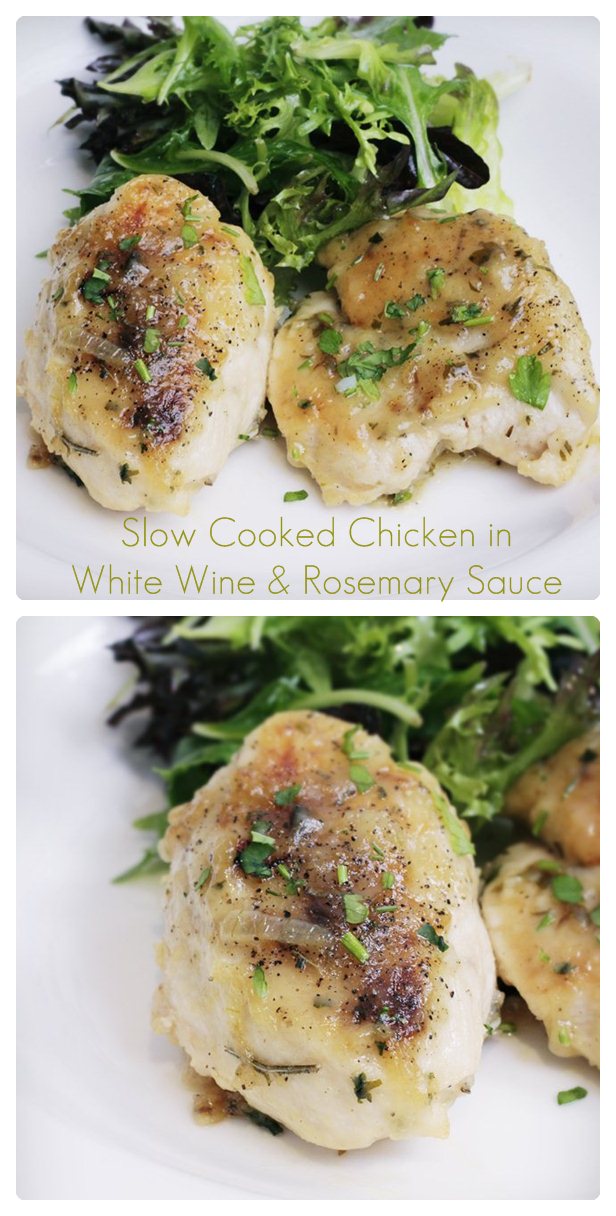
Slow Cooked Chicken in White Wine & Rosemary Sauce
“Wine improves with age. The older I get, the better I like it.” – Anonymous
I never thought it would happen, but somehow I turned into one of those people that love and stockpile wine.
If you had told me this during my tequila-soaked early twenties, I would have laughed and said something along the lines of “Wine is for old people… [hiccup]”.
Now, not only do I like to drink wine, but I’m cooking with it more than ever! My husband says this is bordering on alcoholism. I think he just needs to pour me another glass and shut the hell up!
Truthfully, I’m not a big drinker anymore, but I do enjoy my wine on ocassion, especially in cooking. Wine lends a beautiful flavour to sauces, hearty stews and marinades and almost any meat cooked in wine is delish and tender, melting in the mouth.
This recipe suits a dry white wine. I’ve made this with sweeter, fruitier wines like Moscato before, but the sweetness overpowers the dish, so I’d suggest a dry white. You can use red wine also, but since I break out in hives when I drink red, I stick to white!
When it comes to cooking to wine, it’s tempting to use the cheapo bottle you got as a birthday present from your mother in law the neighbour you don’t like, but the better the wine, the better the taste. If you wouldn’t drink a glass of it, don’t pour it into your food!
INGREDIENTS
- 2 tbsp olive oil
- 4 Chicken Breasts, skin off (trimmed and cut into palm sized pieces)
- 1 small brown onion, diced
- 1 sprig rosemary, chopped finely
- 3 tbsp plain flour
- 2 cups dry white wine
- 1 tbsp chopped parsley
METHOD
- Heat the oil in a frying pan on a low heat, add onions and rosemary, cook it gently then remove it from the pan once it’s translucent and soft.
- Once you’ve removed the onion from the pan, turn the heat up high and drizzle with a little extra olive oil if required.
- Coat the chicken pieces in flour, add them to the hot pan, seal them quickly on both sides until they are browned. Toss in any excess flour from the bowl and cook it off to remove that floury taste.
- Reduce the heat to low and pour in the wine, enough to ensure the chicken is covered. Add the cooked onion and rosemary back into the pan.
- Cook on low heat, covered for about 40-45 minutes minutes, stirring occasionally or until the liquid has reduced and becomes thick. Alternatively, you can also pop a lid on this (if you’re using a casserole-type dish and pop it in the oven at 160C for about an hour) to let it marinate and cook gently in the beautiful wine.
- Sprinkle with parsley a few minutes before turning the heat off.
- Serve with lightly dressed salad greens or mashed potato.
Roasted Garlic & Dijon Mustard Mashed Potatoes
 I live near potato farms which is just cruel considering I’m supposed to be low-carbing and avoiding the only things that make my life worthwhile- pasta, bread and….. potatoes.
I’ve always said I could eat potatoes everyday, in every which way, I just love them so much. Roasted, baked, mashed, boiled, fried- it doesn’t matter, I’d gobble it down.
So recently, with the New Year excesses behind me, I had been a good girl but a recent drive past the potato farm had me weak at the knees. All those beautiful, fresh potatoes, straight from the farms, caked in soil and smelling of the earth, I HAD to have some.
I picked up a huge 10kg bag of spuds and managed to wrangle it to the car (my daily exercise) and started plotting all the delish ways I was going to eat these babies.
One of my favourite foods is mash. I’m not gonna lie. Some of my winter dinners have consisted solely of mashed spuds and some gravy poured over the top.
This recipe is for anyone who is open to trying something new with their mash. For me, I had a hankering for roasted garlic and potatoes so I combined the two together. It’s delish, decadent and smells ever so seductive.
The slower and more gently you roast the garlic, the sweeter it will be so if time is on your side, get it started earlier in the day or use it leftover from another roasting session.
Also, if you have a potato ricer, you’ll get a smoother, more creamy mash.
Don’t laugh, but I had the leftovers today spread across some bread. A mashed potato sandwich. Please tell me I’m not the only one who does this!
INGREDIENTS
- 1 head of garlic, top sliced off
- 2 tbsp olive oil
- 6-8 potatoes, washed, peeled and quartered
- 1 tbsp Dijon mustard
- 1 stick of butter
- 1 cup milk
- Salt & Pepper, to taste
METHOD
- Preheat your oven to 160C.
- Place the head of garlic on a tray lined with baking paper, generously drizzle with olive oil. Roast in the oven for about 45 minutes-1 hour, until golden, soft and fragrant. Allow the garlic to cool for about 20 minutes.
- Meanwhile, bring a saucepan of salted water to the boil and cook the potatoes for about 15-20 minutes. Do the ‘Prick Test’ (Don’t you wish you could do this with some men? lol) with a fork to ensure they’re cooked.
- Drain the potatoes and return back to the saucepan. Add the Dijon mustard, milk, butter and seasoning and mash over low heat until smooth.
- Once the garlic has cooled, peel off the outer skin and gently squeeze the gooey roasted garlic out of about 3-4 cloves. On a chopping board, smoosh it out with the back of a spoon until it becomes a smooth paste. Mix this in with the potatoes until well combined.
Use the leftover roasted garlic cloves to spread on toasted bruschetta or Ciabatta bread or even rub it onto some beef/steaks before cooking for your next dinner.
Peperonata
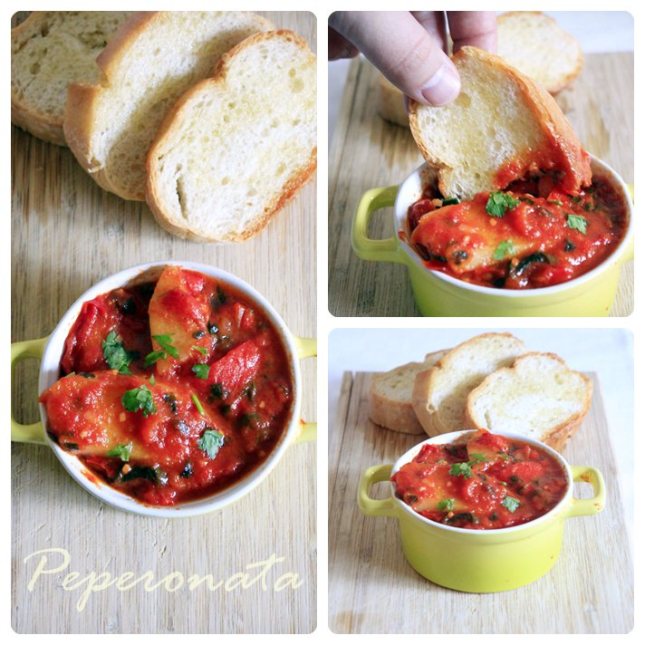 Lately, I’ve been joking with my Italian grandparents about how much I miss the ‘peasant food’ that they grew up with and the recipes they brought to Australia with them and in turned raised us to eat.
The food back then was so simple- my grandparents and parents were raised in a simpler time, where they had to be resourceful with the meat and vegetables they had and would sometimes have to stretch those meals over long periods of time.
And yet, some of their food is the most delicious! Simple recipes, with few ingredients and uncomplicated methods. Sometimes I wonder what the hell we are doing these days with all this deglazing, flambe-ing and tomato-rose garnishes- we need to go old school and just pick a couple of ingredients and cook them simply and season them properly! That’s it! There’s no magic, you won’t die of starvation and the food is healthy, fresh and delish.
Peperonata is one of those favourites. There are lots of variations depending on where you come from and the one I was raised with was a tasty concoction of slow cooked red capsicum, onions, wedges of potato and some peeled tomatoes. You can add basil, garlic and a bit of oregano for extra flavour too (I do, but my grandma won’t- in fact she’d disown me if she found out I was telling people to put them in it, sorry Nonna!).
This is delicious on it’s own with some crusty Ciabatta bread on one of those CBF days. It smells AMAZING while it’s cooking away, so if you’re having people over, they automatically think you’ve been working your butt off in the kitchen because it smells so damn good.
It’s versatile too. Without the potatoes, it would be good tossed through some penne with some Parmesan cheese, in a lasagna, alongside a beef or chicken dish or even as the basis for a good Cacciatore- just add some olives and a few other veggies, some more Passata and slow cook your chicken in it. Delish.
INGREDIENTS
- 1/4 cup of olive oil
- 4 red capsicums, sliced into thick strips
- 2 onions, quartered
- 1 tbsp minced garlic
- 2 potatoes, cut into wedges
- 1/2 bottle tomato passata/ 1 can peeled tomatoes
- 1/3 cup basil, chopped
- 1 tsp dried oregano
- Salt, pepper to taste
METHOD
- Combine all ingredients in a heavy-based pot (non-stick preferred)- a Dutch oven, slow cooker or crock pot, cover and cook on low heat on the stove for 1-2 hours, stirring occasionally, until the sauce has thickened significantly and the capsicums are soft and fragrant.
- Serve with crusty bread and a salad or as a side dish for beef or chicken.
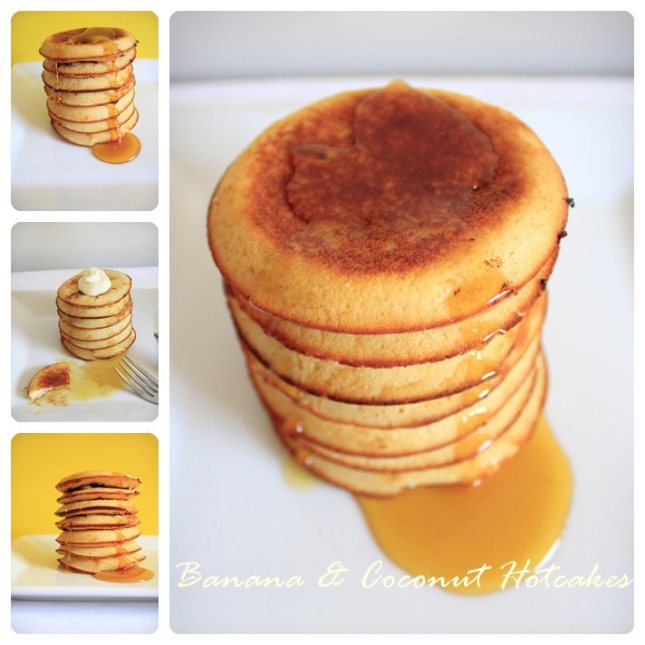
Banana & Coconut Hotcakes
Finally, the last of the festivities has passed on by. Routines are back to normal, leftovers in the fridge have dwindled and fruits and veggies that you stockpiled in preparation for the big feasts are either overripe or ready for the bin!
It’s a shame to see produce go to waste and one of my new year’s resolutions is to try not to be so wasteful in the kitchen. So I had some overripe bananas that were facing a death sentence straight into the trash- but they were saved at the eleventh hour by some quick thinking and a sweet tooth.
Summer sure didn’t miss the memo that it’s now January, it showed up bright and early on New Years Day and we’ve been suffering through some scorching heat ever since. So what better way to make the most out of this stinking weather than with some tropical flavours? Pina Coladas are frowned upon at 10am, but I still managed to get my tropical flavour cravings sated with the delightful combination of banana and coconut.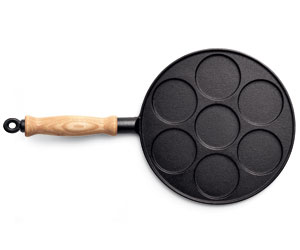
For consistency to ensure they all came out the same size, I used a vintage Margaret Fulton Bessemer pikelet/egg frying pan, handed down to me from my mum (pictured right).
I’m not sure if you can still get them (they have some on eBay, I checked!!), but they’re the best thing since sliced bread and perfect for these sorts of recipes! Pikelets, fritters, eggs, blinis, you name it 🙂
INGREDIENTS
- 1 ripe banana, sliced
- 1 egg, beaten
- 1 cup (250ml) coconut milk
- 1 cup SR flour
- 1 tsp baking powder
- 2 tbsp canola oil
- 2 tbsp maple syrup, plus extra for serving
- Melted butter, for greasing
METHOD
- Place egg, coconut milk, canola oil and maple syrup in a bowl and beat until well combined.
- Sift flour and baking powder into the mixture and mix well until the batter is smoothe and glossy.
- Brush the pan with butter and ladle a few tablespoons of batter for each hotcake. Wait about 1 minute, until the mixture has firmed up and isn’t a sloppy, runny mess and then gently lay a few banana slices in the batter (for presentation purposes in future, I would add mashed banana into the batter mix to prevent this).
- Cook until golden underneath and then gently flip and cook for a brief period banana-side down (if you cook them too long, the banana will caramelise and quickly burn).
- Serve with maple syrup and a dollop of cream or ice cream.
Delish Dinners is now on Facebook!
 I’m the Forest Gump of technology, I’ll be the first to admit. So it only took me 5 years of having this blog to finally decide to get a Facebook page set up where I can post updates, news and chat with all of you guys.
I’m not expecting it to be big and grand but if you would like to show your support by liking the Delish Dinners page or would like to stay updated via Facebook instead of email, click away!
Click here for the Delish Dinners Facebook page. While I’m at it, I want to say thanks for your support. I love reading your emails and comments and chatting about food with other food lovers! My friends get bored of me talking about slow cookers, calzone dough and herbs so I unleash it on you guys 🙂
I’m hoping that 2012 will be a better blogging year for me (unless the Mayans were right and it really is the end of the world as we know it…In that case, eat and be merry I say!).
I’ve got a heap of recipes I want to try out and a willing guinea pig of a husband who’s happy to try them all in the name is research for you guys 😛 It’s a hard life!
So stay safe and eat plenty over the New Year celebrations and I will see you in 2012 with some new recipes. 🙂
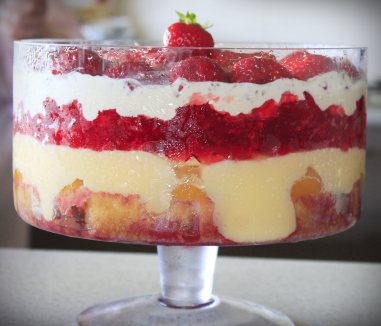
Christmas Trifle
 Merry Christmas to all my wonderful readers and subscribers!
I hope you are all sufficiently pot-bellied and relaxed after your delish Christmas lunches and dinners. What was on the menu at your feast?
I had the pleasure of putting on the Christmas feast this year and even though I made a selection of desserts for the family to enjoy, we all were excited about mum’s trifle.
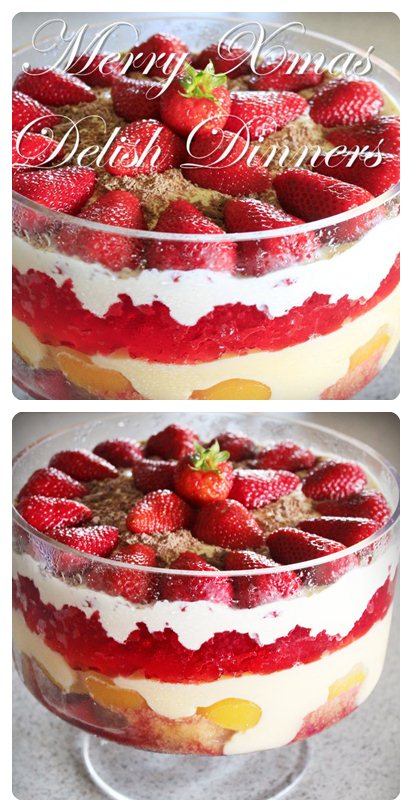
Trifle is of English origin and a great Aussie fave. To the uninitiated , it can be a little frightening at first glance. A right royal mess- layers of booze soaked sponge cake, custard, jelly, cream and fruit. Haven’t you ever heard that sometimes the most unappealing looking food is the tastiest? Well, it’s definitely true in this case!
This dessert is fairly easy to prepare, with basic ingredients. Presentation can be a bit of a challenge, but if you have a pretty bowl and layer everything as neatly as possible, it can look great.
No matter who you talk to, they will all have a different Trifle variation. Do you have a family Trifle variation?
Ours has remained constant throughout the years with only a few tweaks here and there.
Here’s the recipe for my mum’s trifle. Love it or hate it, Trifle combines all my favourite things- custard, cream, fruit, booze and jelly in a layered wonderland of flavours.
INGREDIENTS
- 1 Jam Rollette sponge or sponge cake, sliced into 2-3cm pieces
- 2 cups prepared custard (we make ours from custard powder, the pre-made one in cartons can be a little too sweet, but certainly useable)
- 1 packet of port wine jelly
- 1 packet of raspberry jelly (make ahead if possible)
- 1/2 cup marsala
- 1 can sliced peaches
- 2 cups double cream
- 2 tbsp icing sugar
- 1 Flake chocolate bar, crumbled
- 1 punnet strawberries, washed, hulled and halved
1. Arrange sliced jam roll or sponge in the bottom of a deep glass bowl.
2. Prepare packet of port wine jelly according to directions, stirring to dissolve well. Add marsala and pour over the sponge to soak.
3. Arrange sliced peaches over the sponge.
4. Pour cooled custard over the sliced peaches. Refrigerate until the custard has set.
5. Break up refrigerated raspberry jelly with a fork and layer it on top of the cold custard.
6. The next layer is the cream. It can be whipped or you can use thicker double cream. Stir the icing sugar into the cream and spread it evenly over the jelly.
7. Top with crumbled flake chocolate and sliced strawberries and refrigerate at least 1-2 hours before serving.

